


Snapshot of Eclipse
My plans for software development is to use the native C/C++ on the Arduino and Java using the PI4J library on the Raspberry Pi. Software development was going to take place on the Raspberry Pi using Eclipse for the Java code and the Arduino IDE for the C/C++ code.
I wrote a couple of programs to run on the Arduino that would run the ultrasonic distance finder and servo motor and to drive the car forward in a straight line. Using the distance sensor worked fine. Driving the car straight will require some fine tuning. It turns out that all four wheels do not turn at exactly the same rate, causing the car to slowly drift to one side. Calibrating the wheel motors will be in a future post.
The fun began when I attempted to write code for the LCD Module that I bought. The PI4J was installed along with the WiringPI C/C++ library. The first program died immediately on startup. The PI4J library would not recognize the Raspberry Pi 3 as a valid Raspberry Pi. The problem was that the PI4J library expected to see a specific chip on the Raspberry motherboard. The Raspberry Pi 3 uses the newest version of that chip. Even though it is technically the same chip, has the same functionality, the PI4J library could not recognize that the new chip is in the same chip family.
Googling the subject lead me to the fact that I could not use the stable version of PI4J, version 1.1, on the Raspberry Pi 3 and had to switch to the lasted snapshot, version 1.2. Okay, no big deal. Even though version 1.2 is not the release version, it is pretty stable and has been available for a couple of years. The program still would not run with the PI4J 1.2. Turns out that version 1.2 requires Java 8 where version 1.1 required Java 7.
The next step is to install Java 8. No problem, there were two Java 8 versions that I could install, one from Oracle and another from the freeware community. Either one should be okay to use. This is when I discovered that the lastest version of Eclipse available for the Raspberry Pi is version 3.8 which only uses Java 7. In order to work with Java 8, Eclipse 4.6 is needed, only there are no pre-compiled binaries for Eclipse 4.6 that run on an ARM processor which is the CPU on the Raspberry Pi.
I was faced with a choice. I could either try to build Eclipse on the Raspberry Pi or run Eclipse 4.6 on my laptop and debug remotely. Due to limited space on the Raspberry Pi and the fact that I did not want to setup the environment necessary to build Eclipse from scratch, I opted for remote debugging.
There are a lot of webpages on remote debugging of C/C++ applications with Eclipse and very few on remote debugging of Java. I did manage to find one that was useful. The link is below.
Debugging Java Applications remotely with Eclipse
The steps are as follows:
- Create a Run Configuration for your project, “Run -> Run Configurations…”
- Only need to do this step once.
- Create a Debug Configuration for your project, “Run -> Debug Configurations…”
- Right click on “Remote Java Application” and select “New”.
- Fill in the Connect form. Remember to change the Host field value with the IP Address of your Raspberry Pi. If your Raspberry Pi gets assigned a different IP Address in the future, you will need to edit this field and update it to the new address.
- Only need to do this step once.
- Each time you are ready to debug a program, you start by exporting it.
- Right click on the Project menu and select “Export”. This is the same “Export” menu item in the File Menu.
- Select “Java -> Runable JAR file” and hit Next.
- Select the appropriate Launch configuration that was created in Step 1. Under “Library handling”, make sure that “Package required libraries into generated JAR” is selected.
- Select an Export Destination.
- Hit the “Finish” button.
- Download that jar file from your development system to your Raspberry Pi.
- I recommend creating a directory for remote debugging where you will place this file.
- I use Filezilla, running on the Raspberry Pi, to FTP the jar file from my laptop to my Raspberry Pi.
- On the Raspberry Pi, open a command window and cd to your remote debugging directory.
- Run the following command:
- java -Xdebug -Xrunjdwp:transport=dt_socket,server=y,address=8000 -jar YourFile.jar
- Note, I create a bash script to run this command since I will be running it everytime I want to run a debug session on this code.
- Back on your development system, start a debug session.
- Use the menu next to the Debug Icon since clicking on the Debug Icon may result in a different debug configuration being used.
- Select your debug configuration. Note that it will have bent down/left arrow under the Java Application Icon.
- If your debug configuration is not listed, click on the “Debug Configurations…” menu option and select the configuration that was created in Step 2. This is usually the case for the first time that you run a debug session with a new configuration.
- Debug as if you are running locally.
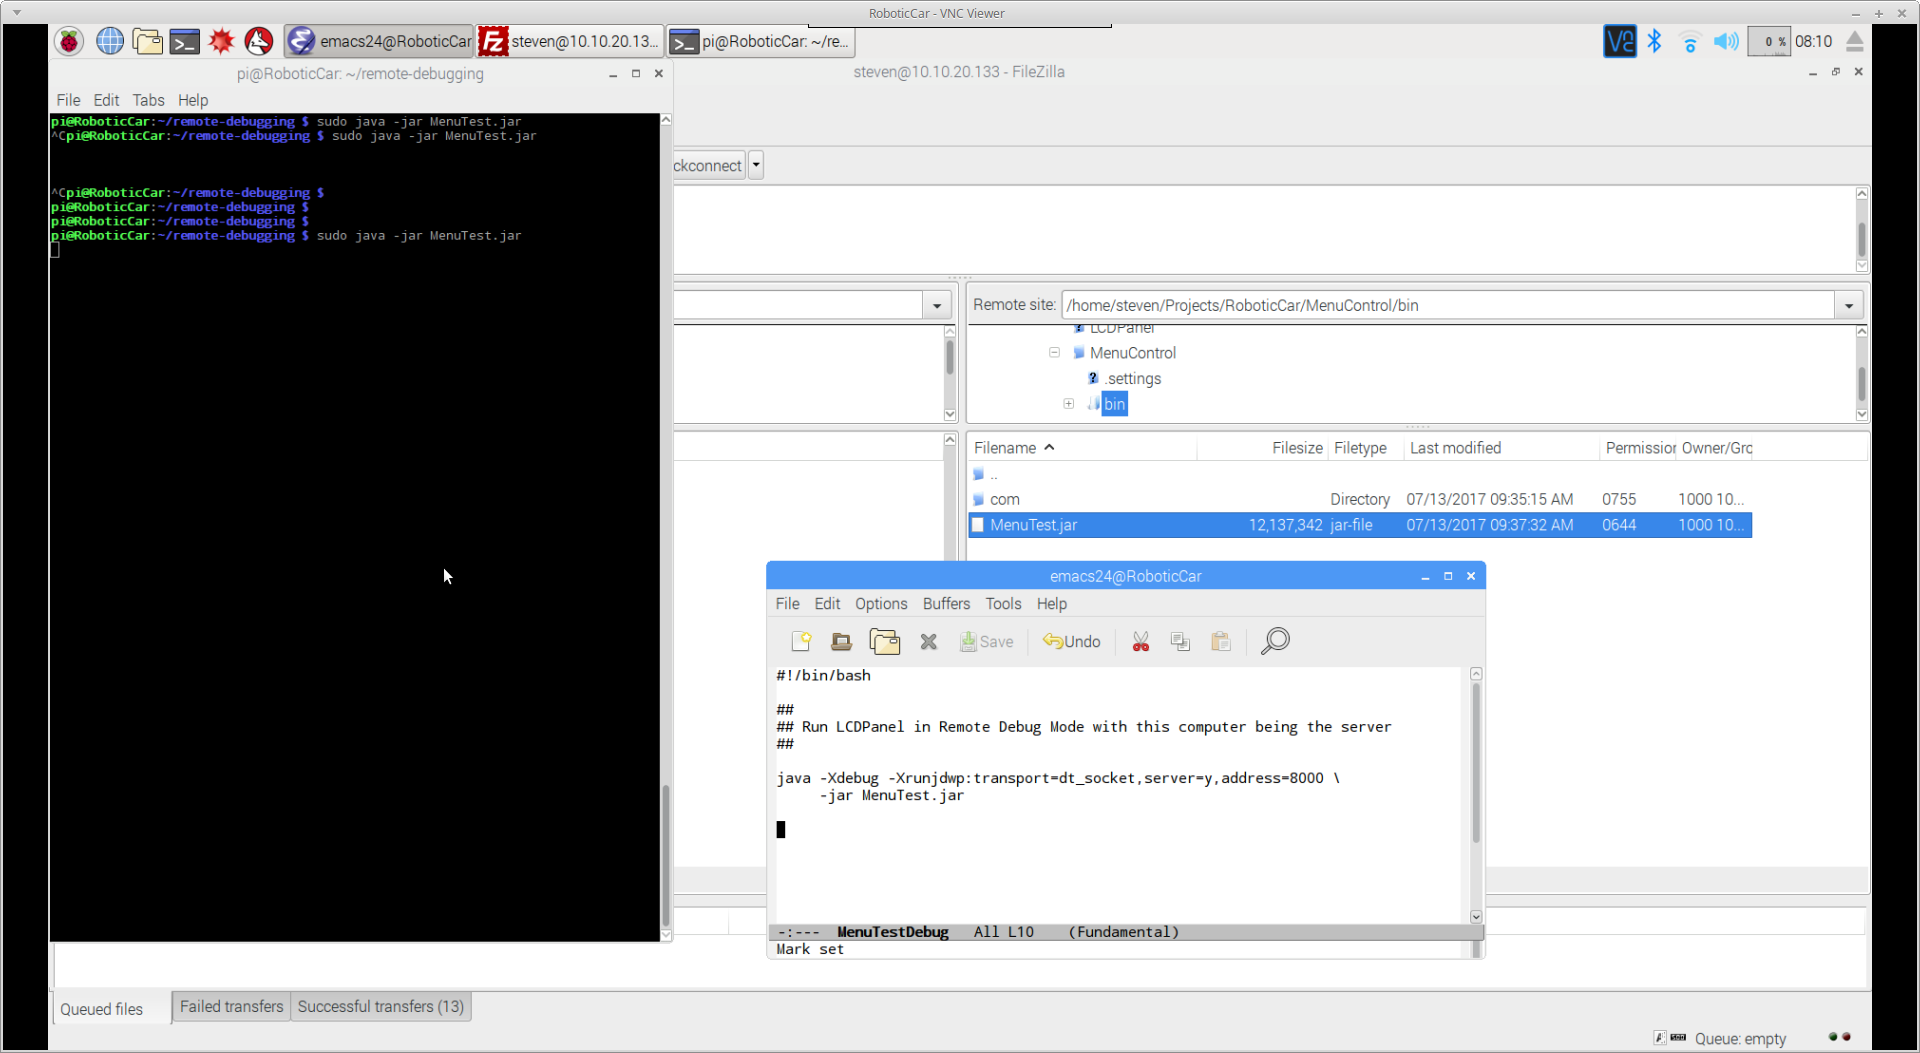
RealVNC accessing Raspberry Pi 3.